
Handskit USB зарядка паяльник 5 в 8 Вт Регулируемая температура Электрический Комплект
US $5.39 - 20.99


Новое поступление
Характеристики
*Текущая стоимость 145,35 - 316,29 уже могла изменится. Что бы узнать актуальную цену и проверить наличие товара, нажмите "Добавить в корзину"
| Месяц | Минимальная цена | Макс. стоимость | Цена |
|---|---|---|---|
| Aug-18-2025 | 184.21 руб. | 188.87 руб. | 186 руб. |
| Jul-18-2025 | 149.64 руб. | 152.69 руб. | 150.5 руб. |
| Jun-18-2025 | 181.5 руб. | 185.53 руб. | 183 руб. |
| May-18-2025 | 180.28 руб. | 184.9 руб. | 182 руб. |
| Apr-18-2025 | 144.3 руб. | 147.15 руб. | 145.5 руб. |
| Mar-18-2025 | 177.53 руб. | 181.64 руб. | 179 руб. |
| Feb-18-2025 | 175.75 руб. | 179.21 руб. | 177 руб. |
| Jan-18-2025 | 174.39 руб. | 177.48 руб. | 175.5 руб. |
Описание товара


Notice
This compact desgined station is ideal for professional use. Soldering can be performed and adjusted from the control knob from 200°C - 450°C. Interchangeable iron plated tips are available to make the soldering station excellent for electronic and electric use.
This professional soldering tool is great for lead-free soldering semiconductors with adjustable temperature controlled soldering irons: 200-450 ° C.
Soldering Iron Length: 22cm
other Length: 110cm
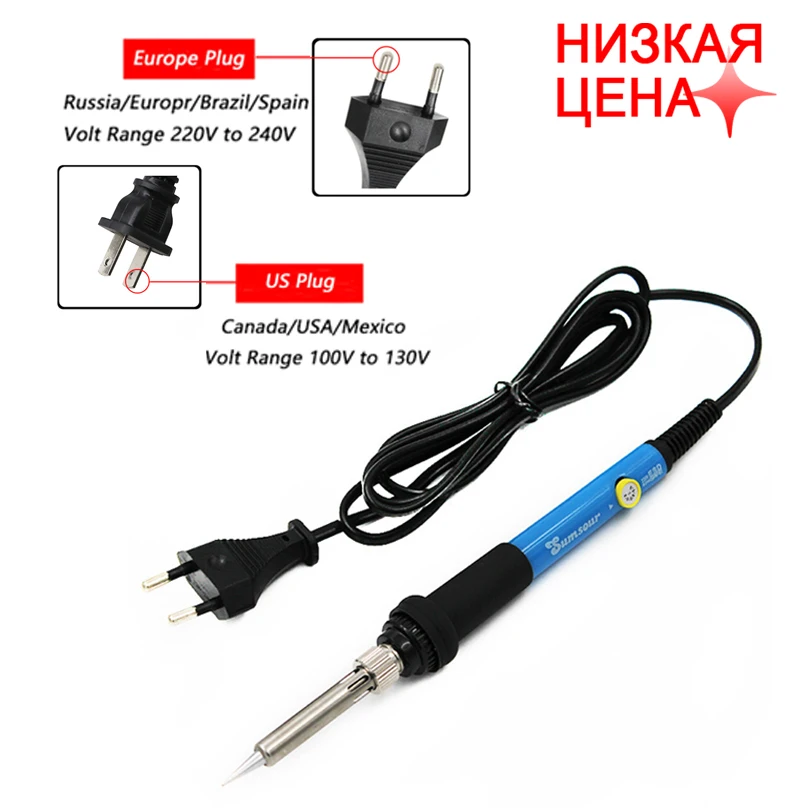
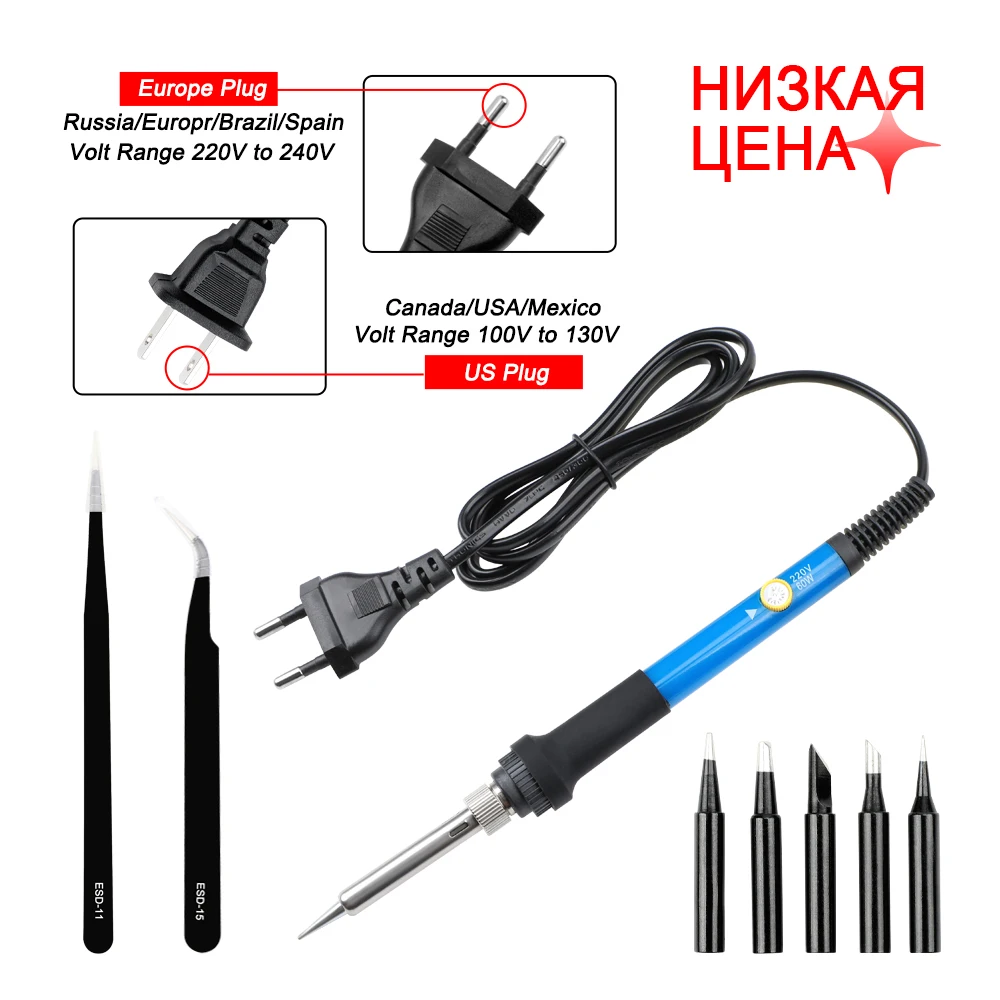
Working Voltage: 110V / 220V 60Hz / 50HZ
US:110V/60W
EU:220V/60W
Power: 60W
Package list :
1 X 60w Soldering Iron ( 110V US Plug / 220V EU Plug )
Instruction
Press the (+) button once to increase 1℃; press and hold it to increase temperature continuously. Press the (-) button once to reduce 1℃; press and hold it to reduce temperature continuously. The newly set temperature will be saved after 3 seconds,and will keep the temperature for next time powering-on.When (℉) or (℃) symbol flashes, it means the heating core has not reached the set temperature.
Product parameter
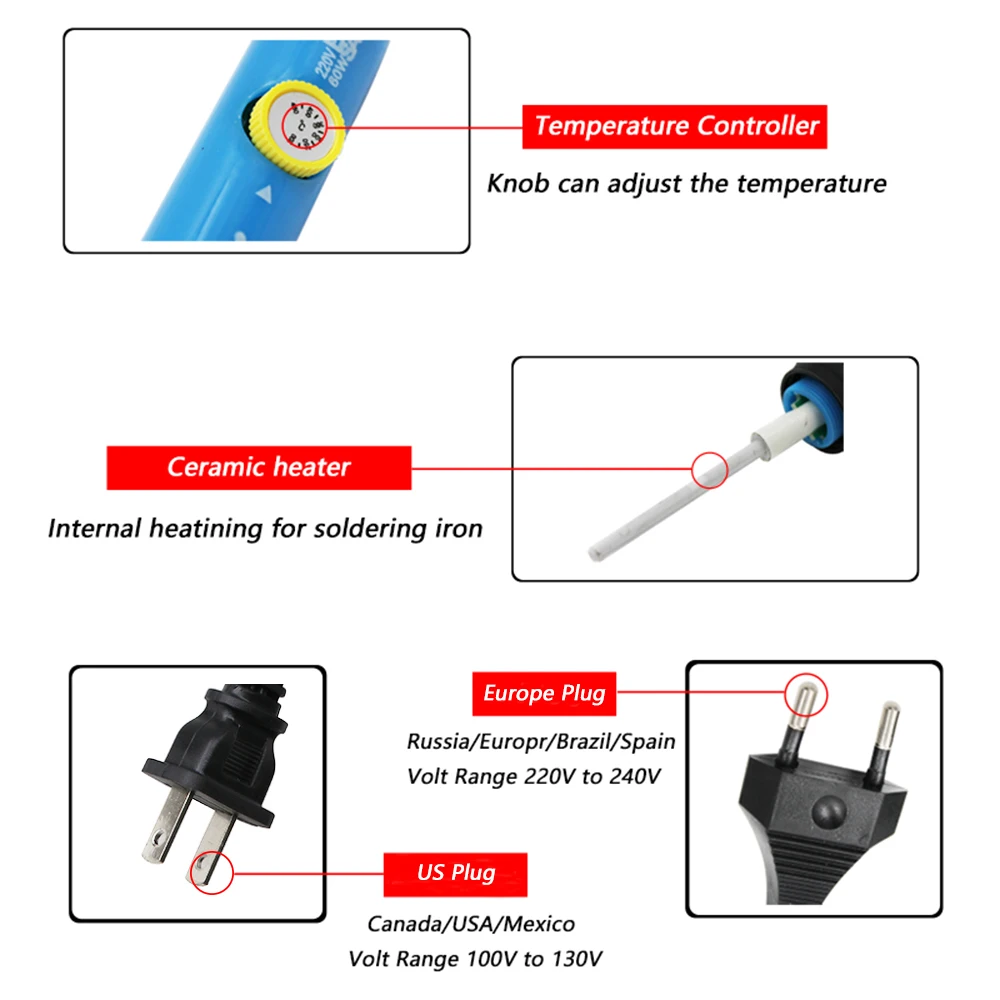
①: Temperature adjustment button
②: Power protection line
③: Thermal insulation protective cover
④: Adjustable screw
⑤: Cooling hole
⑥: Stainless steel casing
⑦: Lead-free soldering iron tip
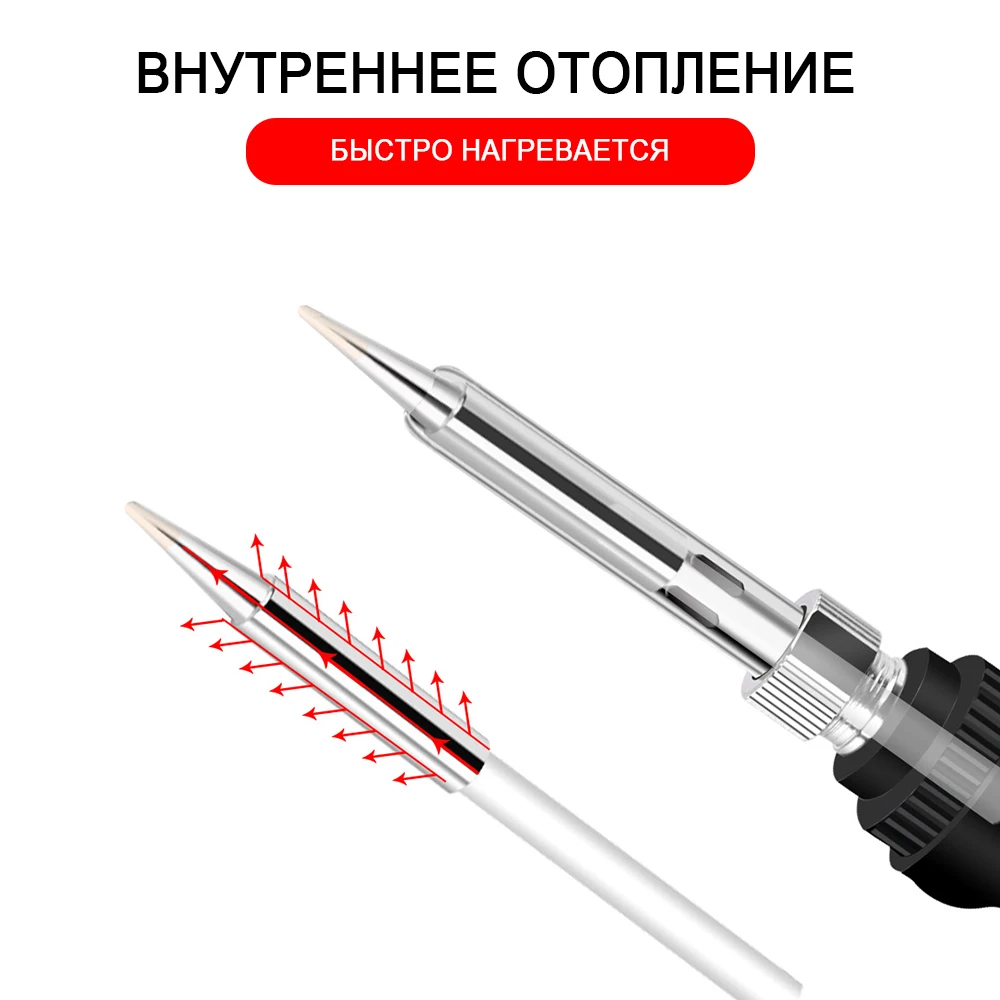
Internal heating core
Internal heating electric soldering iron (imported ceramic heating core is stable and energy-saving from the inside to the outside)
Temperature Calibration:
1.After 60 seconds of power on, put the soldering tip on a thermometer, and a moderate amount of solder on the soldering tip; make the test point and the soldering tip have good touch.
2.When thermometer displays a stable temperature (about 2 seconds), write down the temperature.
3.Move soldering iron away from thermometer; press the (-) and (+) button at the same time to enter temperature Calibration.
4.Input adjustment quantity. Adjustment quantity=set temperature - measured temperature (see example)
5.Press the (-) and (+) at the same time to exit temperature interface, finished. Example 1, when setting temperature is 350℃ while measured temperature is 342℃, the correction steps are as follows: a.press the (-) and (+) at the same time to enter temperature correction interface. b.press the "+" button till the LCD displays 8℃ c.press the (-) and (+) at the same time to exit temperature correction interface Example 2, when setting temperature is 350℃ while measured temperature is 330℃,the correction steps are as follows: a.press the (-) and (+) at the same time to enter temperature correction interface. b.press the (-) button till the LCD displays -20℃ c.press the (-) and (+) at the same time to exit temperature correction interface
Parameter setting:
1.To press the red and white button both at the same time before it is power on, power on,after the LCD is working,stop to press the button, you will enter the setting menu.The LCD shows (F) or (C)
2.Press the white button to choose C(degree centigrade) or F(Fahrenheit).Press the Red button to choose Element U20(JCD01),U20(JC D02),U30(JCD03),U40(JCD04).
3.Pressing the (-) and (+) at the same time to save your setting operation and quit the setting menu(finished) To protect the user from scald, when on the setting menu, it will stop heating.
Failure warning indication
The LCD shows (OP): the heating element is open circuit.
Solution:
1.change the element.
2.To confirm that whether the pin of element is oxidized.
The LCD shows(E1):
The outlet is poor contact,or thebattery source interfering the soldering iron that it is power down.
Solution:
1.Unplug the soldering iron.
2.Close the interfering source.
3.To use it far away from the interfering source. Note: Please do not touch the soldering tip and tube when the power is turned on.
Stainless steel casing
Corrosion resistant and more durable
Thermal Insulation Silicone Cover
Safe and anti-scalding
Statement
The temperature control button of this product is removable. If you receive. The disassembled temperature control button can be installed manually without affecting the normal use of the product.
It is not a case of product damage.
Notice
1. When there is product damage, product loss, logistics problems, please contact me first, and I will properly handle the problem for you.
2. Regarding the delivery, after you place the order, we will deliver the goods for you as soon as possible to ensure the logistics timeliness.
3. If you have not placed an order and have any questions about our products, please contact us in time, and we will reply to your information in time after receiving the message!
4. If there are other quality problems, we will refund immediately after receiving the product photos.
5. Our goal is to provide 5 star service, if you think we are not worth 5 stars, please contact us before leaving feedback.
6. We are very welcome to cooperate with Droshipping, if you are interested in cooperation, please contact us in time, we will give you a price you like!
Dear friend, looking forward to your order!


Смотрите так же другие товары:


